Showing posts with label tutorial. Show all posts

Friday, March 21, 2014

Striped Monogram Pillow Shams {West Elm Knockoff}

Happy Friday, y'all!

I'm over at Teal & Lime today sharing a tutorial on making monogrammed pillow shams.  It's a beginner-level project with big results, so check it out!

DIY West Elm Pillow Shams | bonnieprojects.blogspot.com


You might also be interested in these posts:

Dye your bedspread
How to shorten a flat-weave rug
Make a cute cover for your dress form


Thursday, January 30, 2014

How to Make a Reversible Table Runner on Teal & Lime

2014 is an exciting year for many reasons, one of which is that I'm now a contributor on Teal & Lime, an awesome blog about interior decorating and DIY design.  Every month, I'll be writing a series called Sew Your Decor, and will share a home decor project you can sew.

My first post went live today, and is a tutorial on making a reversible table runner.  This was a quick, inexpensive, and easy project (great for beginners!), and I'm so happy with the results.  Please go check out the full post!
How to Make a Reversible Table Runner | bonnieprojects.blogspot.com

Want to see the rest of the dining room?  I just posted the full reveal earlier this week!


Wednesday, January 22, 2014

American Girl Hula Outfit - Free Pattern

Today's post comes from my Mom.  After her trip to Hawaii and Kauai this year, she was inspired to make Hawaiian outfits for her nieces American Girl dolls.

Hawaiian doll dress with free pattern | bonnieprojects.blogspot.com

She's not a fan of the fabric body of the dolls showing, so instead of a sundress, she opted for an outfit with a little more coverage.  She developed an easy-to-make pattern for a short-sleeve sundress with ruffled hem!  I've posted the pattern for free!

Hawaiian doll dress with free pattern | bonnieprojects.blogspot.com
Traditional Hawaiian print fabrics feature patterns that are too large for doll clothes, so instead she used a fun hibiscus batik.  Half a yard of fabric was enough for two dresses.

Hawaiian doll dress with free pattern | bonnieprojects.blogspot.com

Of course no American Girl outfit is complete without the accessories!  She ordered hula kits from Oriental Trading Company, that come with a grass skirt, necklace lei, and two bracelet leis.  She cut the kid-sized grass skirt in half, trimmed it to 7" long, and added velcro to make hula skirts for the dolls.  The bracelets became doll leis.  She also ordered an extra kit for each kid, so they could have a skirt and lei just like their doll!

Hawaiian doll dress with free pattern  |bonnieprojects.blogspot.com

Between half a yard of fabric and three hula kits, the total cost for two doll outfits (plus matching skirt and leis for the nieces) came to $23.  Not bad!  She also added that they were very quick and easy to put together.


You might also be interested in these posts:

American Girl Doll Dress to Match the Flower Girls


Friday, January 3, 2014

Don't trash those Christmas cards!

I love sending and receiving Christmas cards!  I especially love the ones with photos of the family - it's so fun to see families grow and change throughout the years.


So of course I have trouble throwing them away after Christmas.  They're pictures!  Memories!

Instead, I found a way that I can keep them around.  Make little books!

I took a regular three-hole punch, and centered two of the holes on the long side of the card.  Punch!


Then I corralled all the cards onto one-inch book rings (Staples had them in pretty colors, which I couldn't pass up).


I used my Silhouette to cut a cute cover out of some scrapbooking cardstock, so we'd be able to remember which year they came from.


And that was it!  All the punching and organizing took about 15 minutes.  The book rings were 12 for $4.39, so my grand total came to about 75 cents per year.  Next Christmas, I'll display these in a basket somewhere so people can look through them.


You might also be interested in these posts:

Christmas Card Display
Wine cork fire starters
Christmas Cocktails


Monday, December 9, 2013

Wine cork fire starters

This the gift was the quickest and most budget-friendly yet!


Every time we drink a bottle of wine, I toss the wine cork into a bowl, promising Tommy that one day I'll find something to do with them.  Now I finally did!  My grandmother was doing this at Thanksgiving, not sure where she got the idea from, sorry!


All you do is stuff a container with wine corks (I used a mason jar for added cuteness), and top it off with rubbing alcohol.  My one-quart mason jar, stuffed with corks, used about 16 oz. of alcohol.

To make it pretty, I tied a ribbon and label to the top of the jar.

aren't the corks pretty in there?

I gifted this to my in-laws, who have a wood-burning fireplace.  All they have to do is light one or two below their fire, and it should start right up!

It took me about five minutes to make this, and most of that was getting the bow pretty enough to photograph.  The only thing I bought was the alcohol for $2, and I only used half of it.  Cute gift for $1 and five minutes of time?  Awesome!!!  And the in-laws liked it, too!

**Be sure to practice fire safety and keep this away from the fire!


You might also be interested in these posts:

Ticket stub collection frame
Lanterns filled with ornaments
Upcycled sweater pillow


Tuesday, December 3, 2013

Gift Idea: Easy Ticket Stub Frame

Last year I made a ticket stub frame for my husband out of an IKEA frame.  This year, I found an even easier way to do it!


Michael's sells a 12"x12" top-loading shadow box (they market it for collecting wine corks).  It's also perfect for tickets, and comes pre-made with a slot at the top!  Being 12"x12", a piece of scrapbook paper perfectly fills the background.  And it was 40% off, so of course I bought it.


I got a piece of black and white scrapbook paper, as well as another piece of a polka dot crimson paper with a velvety texture.

I ran the crimson paper through my Silhouette to cut out the logo.  I'm not an Alabama fan, but I sure do know a few!!! 

Then all I had to do was place the letter on the black and white paper, and load it all into the shadow box.


This project cost $22 ($20 for the shadowbox and $2 for the pretty paper), and took less than half an hour.  Most of that time was designing and sizing the "A" in the Silhouette software.


You might also be interested in these posts:

Frame a Ticket Stub Collection IKEA Hack
Holiday Monogram Wreath


Monday, September 30, 2013

How to Shorten a Flat-Weave Rug {Easy Tutorial}

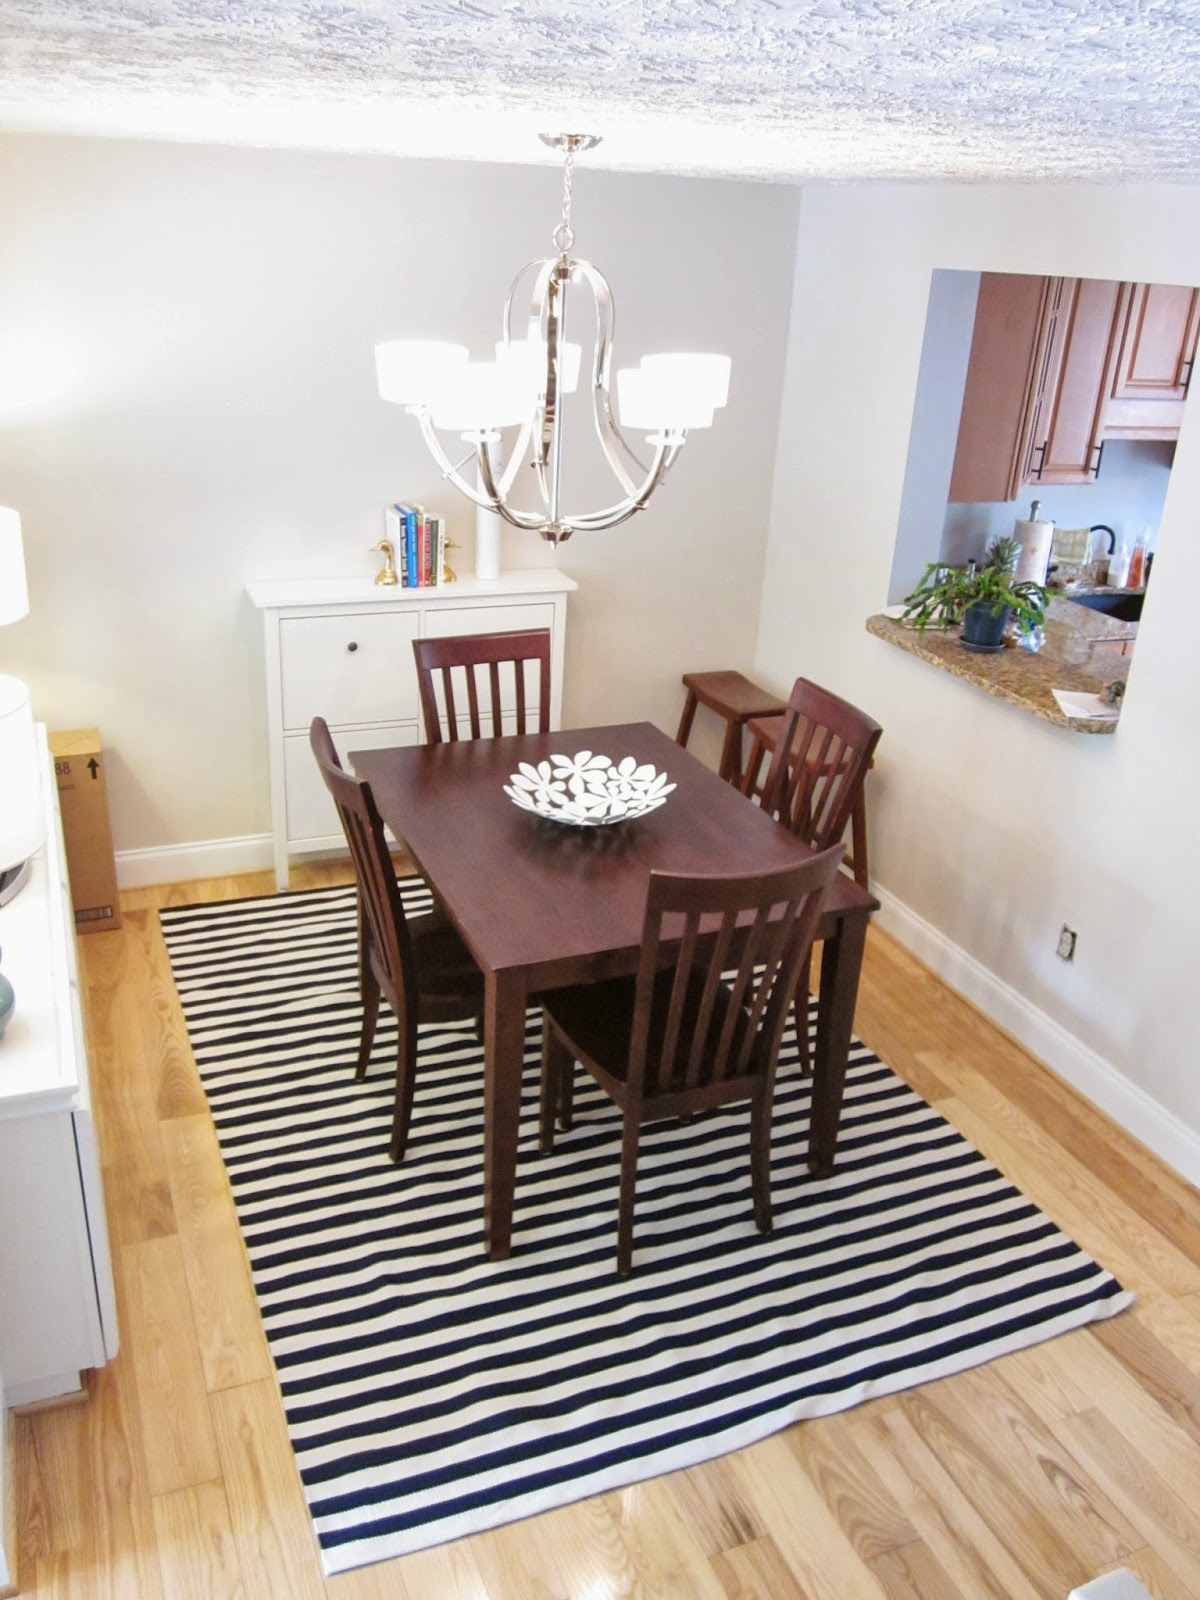
We got this super-cute navy and white striped rug for our dining room.  I love the style and that I can take it outside and hose it down if something spills on it (it's indoor/outdoor).

But.  It was too long.  It was overtaking the main walkway in our house.  The width was perfect, so I didn't want a smaller rug.  I just needed to shorten it!


This was SO EASY!!!

Tommy helped me set up the rug so all the other sides were in the right place.  We eyeballed where the edge of the rug should be (i.e., out of the walkway), and I marked it with a few safety pins.

With a striped rug this was super simple, but with a not-stripy rug I would measure before cutting.

First I cut off just a little so I could know how bad it might fray (bad), and tested out my method (good).


Then I cut off enough so that I had two inches on the rug past where I had pinned it.  This extra length gets folded over twice (to prevent fraying) and sewn down.


That's what I did.  I folded over the end twice, and sewed through all the layers.  My thread matched perfectly, so it didn't matter if I had ugly-looking stitches.  I made sure to keep the roll-over in place with a few clamps.  You know how when you roll up a towel, it gets wonky by the end?  The clamps were to prevent that.


You can see that my stitches aren't perfect, but since the thread matched so well (on the front side), you can't tell!


It took about an hour to hand sew the whole length, but you could do this with the most basic of sewing skills.  Plus, it was free!  All I used was a few yards of thread, which I already had.  I definitely recommend perfectly-matched thread, but the clamps could be substituted with binder clips.   I could also envision using this method to transform a large rug into multiple runners.  I'm already dreaming up what to do with the scrap!

And...ta da!  Custom-sized rug for the dining room.

Much better than before! 


You might also be interested in these posts:

Painting the dining room
Painting the built-ins
An IKEA Hemnes shoe cabinet in the dining room


Tuesday, August 20, 2013

Cute Dress Form Cover

My Mom got an adjustable dress form for me while she was working on my wedding dress.  It's cool, because it can be adjusted to exactly my size.  Unfortunately, she's not that attractive when you can see her innards, and she doesn't match my craft room!


There's an easy fix!  Make a slipcover!

I went with a cotton knit for the fabric.  This saves me from having to perfectly fit the cover to the dress form, and also allows the cover to grow or shrink if I do.

I wrapped the fabric around the dress form and threw in some pins where it needed to meet.  I made it narrower at the waist and larger around the hips and bust.  Knit is so forgiving!


I zoomed it together with my sewing machine (and a knit needle), making sure to match up the stripes because I'm into that kind of thing.

Then I put it inside-out on the dummy to check the size.  It needed some tweaking in the butt area, so I added a few pins to mark the new seam.


After that, it was looking pretty darn good!


To make the neckline lay right, I also pinned everything around the shoulders.


After all the sewing was complete, I turned the slipcover right-side-out and wiggled it onto the dress form.  I reattached the neck thingy at the top.


The cover needed hemming, so I gathered the ends together with a needle and thread, nothing special.


I also covered the pin cushion!


Isn't she adorable now?


For about 45 minutes of work and $12 in fabric, this project got some good bang for its buck.

I love that she matches my size and my craft room.  Now I can get to work making things to wear!

A quick note on making a dress form your size.  I know there are knobs that indicate measurements, but if I make all the hip adjusters say 40", she ends up being a perfect cylinder.  My real body happens to be wider side-to-side than back to front (more of an oval if viewed from above), so I simply adjust all the knobs and keep measuring the circumference on the dress form with a measuring tape until she's got my same measurements and dimensions.

Pin it so you don't forget!


Monday, June 17, 2013

Ironing Board Cover

Remember how when I dyed my wedding dress, some of the dye rubbed off?  With all that blessed ironing I had to do on it, both my iron and my ironing board ended up blue!

I was sick of my cheapo iron anyways, so I relegated it to be more of craft iron than garment iron.  I threw the ironing board cover in the wash.  The dye actually came completely out.  But my cover shrunk so much that I couldn't get it on the board anymore!

Which means I got to do a project!


I know you haven't seen it yet, but in my craft room all the accessories are "Bonnie Pink", so of course I needed a Bonnie Pink ironing board cover!

I dug around and found a large piece of quilting fabric that was perfect!  If you're buying it new, you need about 1.75 yards of cotton.  I also found some leftover batting and cording I had bought for my failed attempt at making roman shades (you'll need 4 yards of cord).

I washed the fabric before doing anything else - I didn't need another one shrinking up on me!  Because I didn't have an ironing board cover, I couldn't iron the fabric first, but this project doesn't require perfection so it wasn't a big deal.  Remember that - perfection is not required!!!!

I laid out the fabric and tried to get it relatively smooth.


Then I laid the batting over the fabric and smoothed everything out.  Our foster kitten told me that it was wide enough to double up, so I did that, too!  (She showed up during a storm a week ago, and is going to her forever home soon!)


I laid the ironing board on top of everything and outlined it with a Sharpie so I'd know how big to make everything.  I pinned all the layers together to keep stuff from shifting.


Then I sewed the layers together, making it so my stitching would end up on the side of the ironing board (it's hard to iron stuff flat if there are lumpy stitches underneath).  Then I trimmed off the excess batting.


I cut the extra fabric off about 2.5" from the edge of the ironing board.  Looking back, I wish I had done 3.5" or maybe even 4".


I sewed the excess into a pocket for the cord to go in.


I forgot to leave a slit so I just cut one instead.  Then I threaded my cord through the pocket using a safety pin attached to the end as a guide.


And that was it!  I put it on the board and tightened the cord! (yay that rhymes)


But... it wasn't a tight as I had hoped.  The ends were fine, but the middle was just eh.


To fix that, I used some scrap fabric and made two sets of ties.  I sewed them to the edges of the cover.  Once the cover was back on the board, I tied the new ties - much better!  Now everything is staying in place.


All in all, this project took about 1.5 hours, and cost $0 since I had all the materials!  The new ironing board looks spiffy with my craft room!  Now I can also get around to all those projects where ironing stuff is a crucial step :)