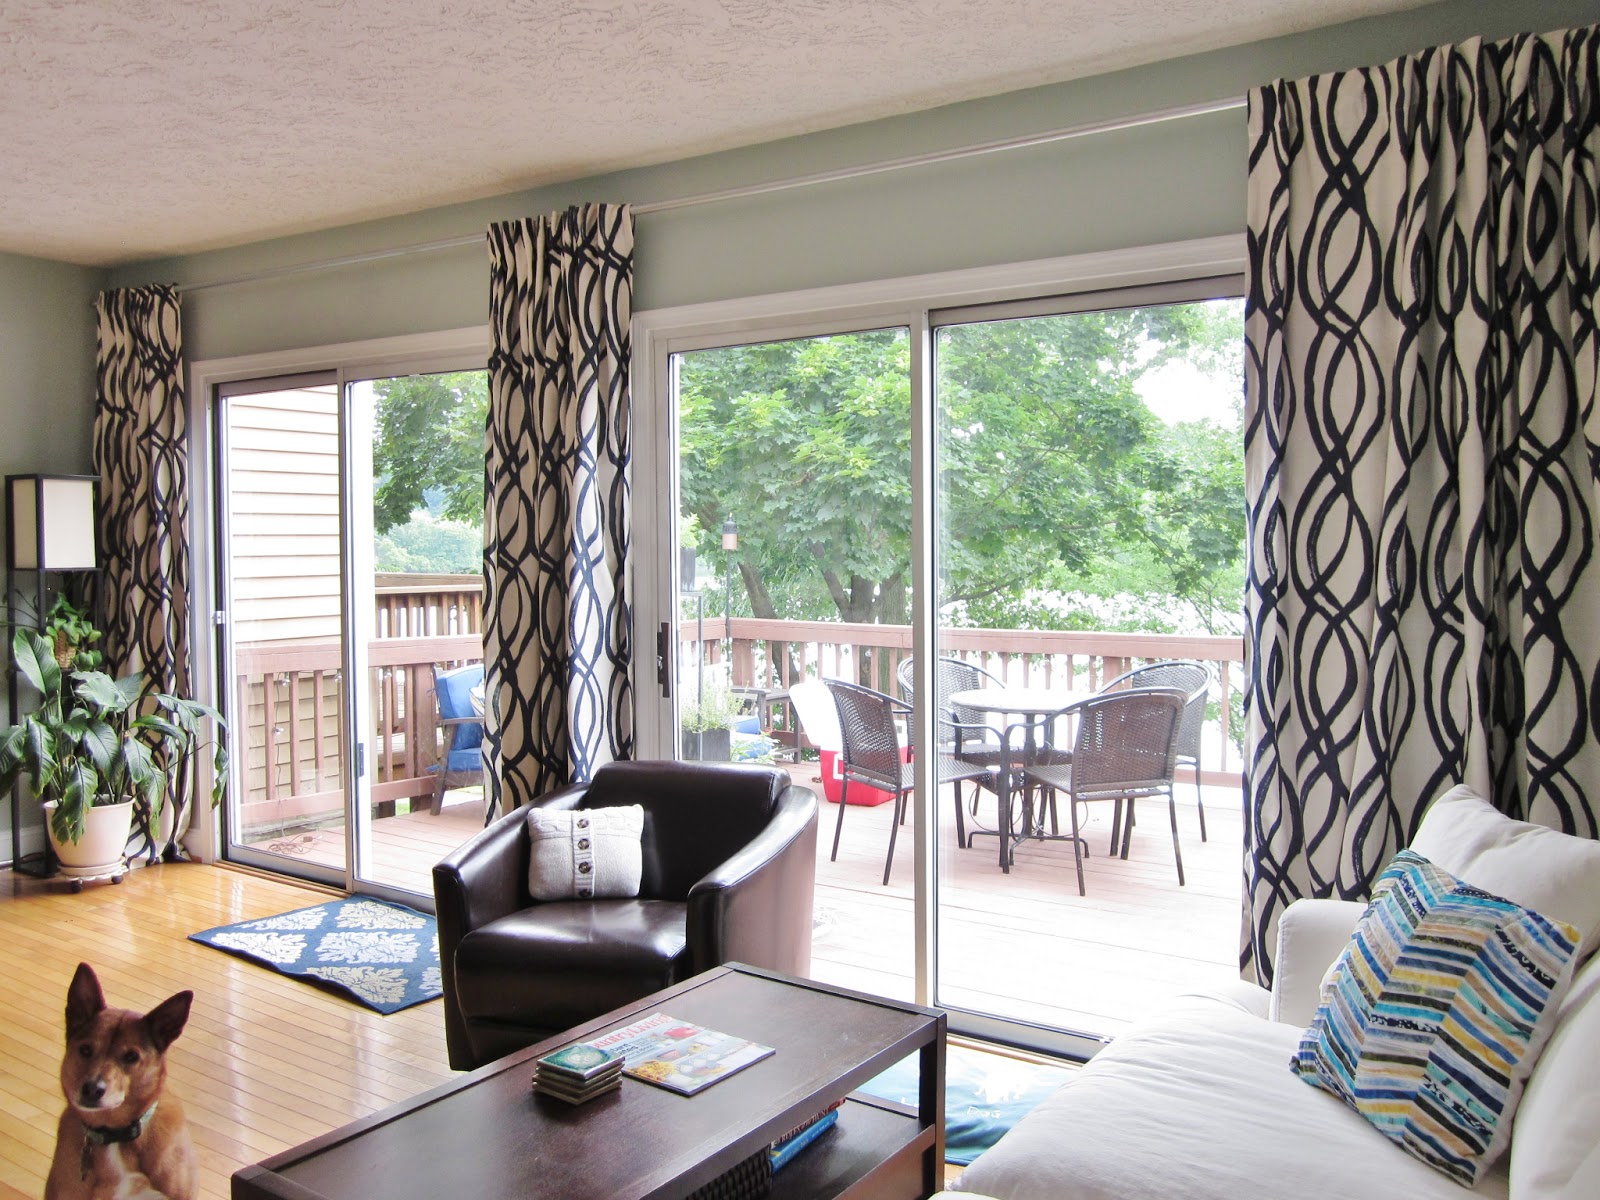
Hi y'all, I have fun news!
I submitted our living room in Apartment Therapy's Room For Color Competition, and it was accepted! While I may not win, at least I know my hard work can hang with some other really pretty places :)
Want to help me out? Please go vote! I can win some pretty cool stuff! And notoriety, which is better anyways.
Thanks!
This blog shares the triumphs and speedbumps of my "projects", from cooking and crafting to remodeling.
Showing posts with label living room. Show all posts
Thursday, September 19, 2013
Thursday, July 25, 2013
Picture Ledge Tutorial
I'm pretty sure every DIY'er in the world has been making picture ledges lately, and now I know why! They're easy and awesome!
We have a 12' wall above the sofa in our living room that was just begging for some love. That said, we don't have the budget to get a single piece of art big enough for the space. Plus I love to change my mind all the time.
The perfect solution was a large picture ledge. The frames and stuff just sit on it, so I can move them around as I please without creating any new holes in the walls.
Of course nobody sells a six-foot picture ledge, and of course I would have DIY'ed it anyways, so that's what we did!
I wanted to use IKEA Ribba frames for the photos, and some of them are almost 2" deep, so the shelf needed enough depth to be able to layer the frames. Rather than the standard 4" depth for picture ledges, I made these 6" deep. To be honest, they could stand to be even deeper!
Materials:
After cutting everything the right length, we put wood glue on every place two pieces of wood would touch, clamped everything together, and nailed it together with finishing nails. As my Civil Engineer Dad would say, "if in doubt, build it stout!".
Along the "build it stout" line of thought - that's exactly what the two short pieces of 1 x 2 are for. Since all the weight of the shelf is cantilevered out from the wall, having those additional pieces to provide support make the shelf much stronger. IKEA, Pottery Barn, and many tutorials leave that part out, and I think that's a big mistake!
Once it was dry, we used leftover white trim paint to paint it. Tommy did all the painting, but he's not a fully-trained DIY blogger yet, so no photos!
To hang it on the wall, we located and marked all the studs that would be behind the shelf. We made the same marks on the shelf, and drilled pilot holes. Then we screwed the shelf directly into the studs using 3" screws. All of this was kind of a pain, and I think it would have been easier to just use drywall anchors.
We weren't convinced it would be strong enough to hold all those frames (and we were having visions on it collapsing on us during a tense moment of House of Cards), so we piled it up with heavy innocuous stuff to test it out. Like Tommy's shoes. Yes, I'm weird.
It held, so the frames went up!
I can't wait to finish our wedding album so I can add it to the space!
In all, this was a pretty easy project. We were scared about how much weight the shelf would hold, but so far we've been happy. I don't remember exactly how much the wood cost, but I would guess under $20. We probably spent a total of three hours working on it, but a lot of that was problem solving and waiting for stuff to dry. I already did some of that for you, so yours should go even faster!
You might also be interested in these posts:
Living Room Curtains
Living Room Paint
Scrappy Pillows
Living Room Sofa
We have a 12' wall above the sofa in our living room that was just begging for some love. That said, we don't have the budget to get a single piece of art big enough for the space. Plus I love to change my mind all the time.
The perfect solution was a large picture ledge. The frames and stuff just sit on it, so I can move them around as I please without creating any new holes in the walls.
Of course nobody sells a six-foot picture ledge, and of course I would have DIY'ed it anyways, so that's what we did!
I wanted to use IKEA Ribba frames for the photos, and some of them are almost 2" deep, so the shelf needed enough depth to be able to layer the frames. Rather than the standard 4" depth for picture ledges, I made these 6" deep. To be honest, they could stand to be even deeper!
Materials:
- 1 x 6 board, cut six feet long, minus the "1 inch" width of the 1x2
- 1 x 4 board, cut six feet long
- 1 x 2 board, cut six feet long, plus two small pieces cut to be equal to the width of the 1x6
After cutting everything the right length, we put wood glue on every place two pieces of wood would touch, clamped everything together, and nailed it together with finishing nails. As my Civil Engineer Dad would say, "if in doubt, build it stout!".
Along the "build it stout" line of thought - that's exactly what the two short pieces of 1 x 2 are for. Since all the weight of the shelf is cantilevered out from the wall, having those additional pieces to provide support make the shelf much stronger. IKEA, Pottery Barn, and many tutorials leave that part out, and I think that's a big mistake!
Once it was dry, we used leftover white trim paint to paint it. Tommy did all the painting, but he's not a fully-trained DIY blogger yet, so no photos!
To hang it on the wall, we located and marked all the studs that would be behind the shelf. We made the same marks on the shelf, and drilled pilot holes. Then we screwed the shelf directly into the studs using 3" screws. All of this was kind of a pain, and I think it would have been easier to just use drywall anchors.
We weren't convinced it would be strong enough to hold all those frames (and we were having visions on it collapsing on us during a tense moment of House of Cards), so we piled it up with heavy innocuous stuff to test it out. Like Tommy's shoes. Yes, I'm weird.
It held, so the frames went up!
I can't wait to finish our wedding album so I can add it to the space!
In all, this was a pretty easy project. We were scared about how much weight the shelf would hold, but so far we've been happy. I don't remember exactly how much the wood cost, but I would guess under $20. We probably spent a total of three hours working on it, but a lot of that was problem solving and waiting for stuff to dry. I already did some of that for you, so yours should go even faster!
You might also be interested in these posts:
Living Room Curtains
Living Room Paint
Scrappy Pillows
Living Room Sofa
Tuesday, June 25, 2013
Extra Long (and cheap!) Curtain Rod
Weren't those curtains last week exactly what was needed to finish off the living room?
Did you stop to wonder how in the heck we managed to get a 20' curtain rod?
Ordering the curtains was easy. The problems started when we tried to hang them. That wall with the sliding doors is 20 feet wide, so not just any curtains rods would do.
First we tried two 10' rods. The problem with regular curtain rods is that they require a center support. If you use the center support, the curtains have to be on both sides of it, meaning that in our living room, we'd have a lot of curtain mass bunched between the doors in the center, which I didn't want at the time, even though we're doing it now.
We tried hanging them without the center support, but the rods were wimpy and sagged under the weight of the curtains panels. FAIL. So we returned them. Did I mention they're like $150 for two?
Next we researched curtain tracks. These are not only ugly, but they're also expensive ($300) and get poor reviews. We thought it was our only option, so we ordered them. In the end, it turns out I didn't ever click "order" (don't drink and shop online?), so they never came! I was really excited about this instance of serendipity, because in the meantime I thought up an even better idea!
Back when my Mom had a women's clothing store, she used electrical conduit poles to hang stock in the warehouse. I'm talking hundreds to thousands of pounds of clothing hung on each pole. Turns out a 10' conduit pole is not only strong, but is also only $7!!!
The strength of the pole allowed me to have a 10' span of rod, uninterrupted by a support. I bought two 10' conduit poles, 1" in diameter.
Now I just had to figure out how to attach it to the wall!
I bought every single thing sold at Home Depot that might possibly work (L brackets, shelf brackes, curtain rod brackets, wood pieces used for stairs, etc.), and brought it all home. In the end, what worked best and looked best was a shelf bracket.
We attached it to the wall with super-duper triple-action drywall anchors. We attached the conduit with conduit straps. The center bracket acts as the support for both poles.
Shopping List (they're not paying me, I just wanted to show you what we bought):
I'll admit that these are not the most-beautiful-ever-in-life curtain rods. However, they cost less than $25, span 10 feet without a center brace, and with the pattern on the curtains, you don't really notice them anyways.
I'll take it!
If you're not crazy about the look of conduit, I used some hammered spray paint recently that would give these a beautiful finish. I didn't bother for this project, but maybe in the future I'll decide to spruce them up. Something to think about. In other homes, I bet gold or wrought iron black would look amazing.
So for a few hours of labor (mostly trial and error to see what would work) and $25, we were finally able to hang up those curtains! Sure beats the $150 ones that sagged or the $300 ones that were ugly and probably wouldn't even work all that well.
On future projects, even if I don't need a 10' span, I'll definitely be going with conduit. The economics are just too good!
This project was really easy, and one I would definitely recommend! Be sure to have a friend on hand - this was sooo much easier with two people.
Did you stop to wonder how in the heck we managed to get a 20' curtain rod?
Ordering the curtains was easy. The problems started when we tried to hang them. That wall with the sliding doors is 20 feet wide, so not just any curtains rods would do.
First we tried two 10' rods. The problem with regular curtain rods is that they require a center support. If you use the center support, the curtains have to be on both sides of it, meaning that in our living room, we'd have a lot of curtain mass bunched between the doors in the center, which I didn't want at the time, even though we're doing it now.
We tried hanging them without the center support, but the rods were wimpy and sagged under the weight of the curtains panels. FAIL. So we returned them. Did I mention they're like $150 for two?
Next we researched curtain tracks. These are not only ugly, but they're also expensive ($300) and get poor reviews. We thought it was our only option, so we ordered them. In the end, it turns out I didn't ever click "order" (don't drink and shop online?), so they never came! I was really excited about this instance of serendipity, because in the meantime I thought up an even better idea!
Back when my Mom had a women's clothing store, she used electrical conduit poles to hang stock in the warehouse. I'm talking hundreds to thousands of pounds of clothing hung on each pole. Turns out a 10' conduit pole is not only strong, but is also only $7!!!
The strength of the pole allowed me to have a 10' span of rod, uninterrupted by a support. I bought two 10' conduit poles, 1" in diameter.
Now I just had to figure out how to attach it to the wall!
I bought every single thing sold at Home Depot that might possibly work (L brackets, shelf brackes, curtain rod brackets, wood pieces used for stairs, etc.), and brought it all home. In the end, what worked best and looked best was a shelf bracket.
We attached it to the wall with super-duper triple-action drywall anchors. We attached the conduit with conduit straps. The center bracket acts as the support for both poles.
| they didn't need to be exactly 10' each, so Tommy cut off a little with a hacksaw |
Shopping List (they're not paying me, I just wanted to show you what we bought):
- 1" diameter conduit
- Shelf brackets
- Conduit straps
- Drywall anchors
- Hammered spray paint (optional)
| Let's play "where's Waldo?" with the bracket... |
| there it is! |
| pretty simple, just a shelf bracket, conduit strap, and conduit piping |
| We left conduit past the ends so we could use the curtains to cover the brackets |
I'll admit that these are not the most-beautiful-ever-in-life curtain rods. However, they cost less than $25, span 10 feet without a center brace, and with the pattern on the curtains, you don't really notice them anyways.
I'll take it!
If you're not crazy about the look of conduit, I used some hammered spray paint recently that would give these a beautiful finish. I didn't bother for this project, but maybe in the future I'll decide to spruce them up. Something to think about. In other homes, I bet gold or wrought iron black would look amazing.
So for a few hours of labor (mostly trial and error to see what would work) and $25, we were finally able to hang up those curtains! Sure beats the $150 ones that sagged or the $300 ones that were ugly and probably wouldn't even work all that well.
On future projects, even if I don't need a 10' span, I'll definitely be going with conduit. The economics are just too good!
This project was really easy, and one I would definitely recommend! Be sure to have a friend on hand - this was sooo much easier with two people.
Wednesday, June 19, 2013
Living Room Update: Curtains
These lovely curtains were the very first thing we changed when we bought our house. Mauve, beige, plaid, and dog-pee-stained, no thank you!!! We moved in and they moved out.
And then it took me six months to pick out new ones. I considered making my own, but when I saw these Scribble Window Panels in midnight blue in the West Elm catalog, I couldn't turn them down! At $35 a panel (after discounts), they were relatively affordable, so I ordered them!
Hanging them was quite the challenge (more on that soon). Apparently a 20' span isn't a run-of-the-mill kind of curtain project.
They really make the room feel finished. These curtains soften the room and simply make our home feel "us". {sigh.}
I love how the waves mimic the motion in the lake out back. I also love that they can block the view into our living room from the neighbor's deck!
They're a fun pattern, without being feminine. They also tie in nicely with our beachy-without-actually-being-beachy living room theme.
They're a little overwhelming when totally closed, but we don't have them like that very often - only on super sunny afternoons so far.
I haven't bothered to hem them yet, but I actually kind of like how they "break" on the floor. I'm debating whether to sew the panels together. If I don't we can choose to push them all the way to the sides or keep some in the middle. But not sewn, they're more of a pain when you want to close them because you have to arrange each one just so. I have bigger fish to fry right now, so they'll stay unsewn for a while longer.
Curtains really provide a lot of bang for the buck. For a total project cost of $230, they gave a completely different feel to the room. And a lot of privacy! They also make a huge difference with solar radiation - if we close these when the sun is pouring in, it keeps the room a lot cooler. So I'm smitten!
BTW, scroll back up to the first photo - I'm pretty excited over how far our home has come in the past year!
And then it took me six months to pick out new ones. I considered making my own, but when I saw these Scribble Window Panels in midnight blue in the West Elm catalog, I couldn't turn them down! At $35 a panel (after discounts), they were relatively affordable, so I ordered them!
Hanging them was quite the challenge (more on that soon). Apparently a 20' span isn't a run-of-the-mill kind of curtain project.
They really make the room feel finished. These curtains soften the room and simply make our home feel "us". {sigh.}
I love how the waves mimic the motion in the lake out back. I also love that they can block the view into our living room from the neighbor's deck!
They're a fun pattern, without being feminine. They also tie in nicely with our beachy-without-actually-being-beachy living room theme.
They're a little overwhelming when totally closed, but we don't have them like that very often - only on super sunny afternoons so far.
I haven't bothered to hem them yet, but I actually kind of like how they "break" on the floor. I'm debating whether to sew the panels together. If I don't we can choose to push them all the way to the sides or keep some in the middle. But not sewn, they're more of a pain when you want to close them because you have to arrange each one just so. I have bigger fish to fry right now, so they'll stay unsewn for a while longer.
Curtains really provide a lot of bang for the buck. For a total project cost of $230, they gave a completely different feel to the room. And a lot of privacy! They also make a huge difference with solar radiation - if we close these when the sun is pouring in, it keeps the room a lot cooler. So I'm smitten!
BTW, scroll back up to the first photo - I'm pretty excited over how far our home has come in the past year!
Tuesday, June 18, 2013
Living Room Update: Sofa
I'm not just here to brag on our new sofa - I also want to share that the right sofa can make an awkward room feel normal again.
We have a weird-shaped living room. It's 20' x 12 ', has an entire wall of sliding glass doors (with a spectacular view), and can be seen from everywhere on the main floor. The TV can only be hung on the short walls. See how awkward it was before?
Those specs left me with sort of a design challenge. Split the room? It's kind of small. Add more chairs? Looks cramped. Sit a long way from the TV? Then he'll want a bigger one.
We weren't really planning on replacing our sofa - our premarital one was good enough. Or so we thought, until we both got the flu (the one that's like a cold that makes you want to die) for a week and spent most of it on the couch. After a week on the couch, we concluded it was too small and too uncomfortable, and it had to go, like now. Luckily, it also coincided with the time of year sofas go on sale!
Once we were over the flu for about a week, we hit the furniture stores. We ended up finding the sofa of our dreams, on sale, at Arhaus.
We hemmed and hawed with all sorts of options, and finally went with a large-size sectional L-shaped sofa. We splurged in the comfort department and opted for down-filled cushions. On the practical side of things, it has a fitted slipcover, so I can take it off and launder it if anything bad happens. We can also order a different slipcover in the future if we decide white isn't working for us anymore. Arhaus has carried this style for over 30 years, with plans to keep it in their stock forever, so we can order more pieces in the future if we happen to move.
Oh, and it seats about a dozen people if need be (hello in-laws!) - or at least both of us and the dog all sprawled out!
And we love it! It feels like it was made for this room, and it makes the room so much more functional. We can see the lake, the kitchen, and even the TV (though it is 20' away...).
I topped it off with my Caribbean scrap pillows. We kept the coffee table (love the storage) and tiny rug. If you look close, you'll also see Lucky's toy basket hiding in the corner.
You might also notice a new picture ledge and snazzy curtains - more on those soon!
While it's by far the priciest piece of furniture we've ever bought, it's also our favorite! Well worth the money, if you ask me :)
Are there any pricy pieces of furniture you've been glad you bought? Share below!
We have a weird-shaped living room. It's 20' x 12 ', has an entire wall of sliding glass doors (with a spectacular view), and can be seen from everywhere on the main floor. The TV can only be hung on the short walls. See how awkward it was before?
Those specs left me with sort of a design challenge. Split the room? It's kind of small. Add more chairs? Looks cramped. Sit a long way from the TV? Then he'll want a bigger one.
We weren't really planning on replacing our sofa - our premarital one was good enough. Or so we thought, until we both got the flu (the one that's like a cold that makes you want to die) for a week and spent most of it on the couch. After a week on the couch, we concluded it was too small and too uncomfortable, and it had to go, like now. Luckily, it also coincided with the time of year sofas go on sale!
Once we were over the flu for about a week, we hit the furniture stores. We ended up finding the sofa of our dreams, on sale, at Arhaus.
We hemmed and hawed with all sorts of options, and finally went with a large-size sectional L-shaped sofa. We splurged in the comfort department and opted for down-filled cushions. On the practical side of things, it has a fitted slipcover, so I can take it off and launder it if anything bad happens. We can also order a different slipcover in the future if we decide white isn't working for us anymore. Arhaus has carried this style for over 30 years, with plans to keep it in their stock forever, so we can order more pieces in the future if we happen to move.
Oh, and it seats about a dozen people if need be (hello in-laws!) - or at least both of us and the dog all sprawled out!
And we love it! It feels like it was made for this room, and it makes the room so much more functional. We can see the lake, the kitchen, and even the TV (though it is 20' away...).
I topped it off with my Caribbean scrap pillows. We kept the coffee table (love the storage) and tiny rug. If you look close, you'll also see Lucky's toy basket hiding in the corner.
You might also notice a new picture ledge and snazzy curtains - more on those soon!
While it's by far the priciest piece of furniture we've ever bought, it's also our favorite! Well worth the money, if you ask me :)
Are there any pricy pieces of furniture you've been glad you bought? Share below!
Thursday, May 2, 2013
Caribbean Inspired Scrap Pillows
We took our honeymoon to the Caribbean in January...after months and months of cold dreary days winter days, we were blown away by the bold and beautiful sun-drenched colors of the Caribbean!
I just had to bring some of that joy back home with us!
I've been aiming us towards a loosely-defined beach inspired living room. Our initial inspiration for the room were some palm tree coasters
Tommy picked up on his first trip to St. John, USVI. We love that Tommy Bahama feel they have. That said, I've been avoiding in-your-face beach stuff like shells and starfish pillows - they're a little much for suburban DC. I also found some glass coasters at Anthropologie over Christmas and had to bring those home, too.
Over-the-top beach is too much, but beachy colors are OK, right?
I saw these pillows in the West Elm catalog the day after we got home - they were so whimsical and fun! The colors weren't really doing it for me though. Time to DIY my own knockoff scrappy pillows!
Lucky for me, I have a quilter Mom who has been making hundreds of sunset quilt kits (buy one here!).
The 12" blocks she sells leave scraps that are far too useful-looking to throw away. I called her up and "ordered" an shipment of assorted scraps. Thanks Mom!
I pressed and starched all the pieces to make them behave nice, then I cut 1/2" strips on the bias, at least 5" long. I planned ahead to let the edges fray a little in the wash - cutting the fabric on the bias keeps the fraying from getting out of control.
I did this for all the fabrics she sent me, and ended up with a pretty fabulous collection!
Next I cut four 5" strips of muslin. The goal is an 18" pillow, so 18"/4 = 4.5", but then you have to add 1/4" on each side for the seam allowance, which gets you up to 5". I cut the muslin strips longer than necessary, since I was sewing the colorful strips on at an angle.
I laid down a variety of strips with controlled randomness. At first it didn't look right, so I called Mom! I was using too much red. Narrowing the colors to blue, green, and yellow helped a lot.
Something else wasn't quite right. Mom came to the rescue again to remind me that I had forgotten to leave white space. Duh!
I tried just sewing the strips on, with no pins or guides, but that was a disaster. They were crooked and messy, and it wasn't working. I also tried using the same color thread for them all, and that look bad too.
Instead, I measured where each strip should start, then pinned the strips down.
I used five different colors of thread, matching as close to the various colors as possible - yellow, turquoise, sage, navy, and cerulean. Much better!
Once the panels were done, I trimmed off the excess, lined up the stripes, and sewed the panels together.
Then I squared up my pillow front and cut it down to 18.5" square. At this time, I also cut an 18.5" muslin square for the pillow back.
I sewed the front and back together, and installed an invisible zipper along one side. This was a complete pain, and I wouldn't do it again! Save yourself the trouble and just make a pocket for the pillow form!!!
I ran them through a vigorous wash cycle with a Shout Color Catcher
(so those pretty blue dyes wouldn't ruin the muslin) to get the frayed look I was going for. Bright color + fraying = Caribbean, right?
I inserted the pillow form (a higher-quality one I got on sale at JoAnn), and was done! Oh yeah, except then I made two more...
This project took sooo loooong, but most of that time was spent cutting strips from 35 fabrics (I have lots of leftovers), getting the colors right, and installing those stupid zippers. Live and learn. Along the way, I also had a little accident with my rotary cutter. Those buggers are sharp, so keep your fingers out of the way! My pillows probably cost about $15 each, but took a bazillion hours.
In the end, it was all worth it.
I'm not sure my pillows are much cheaper than West Elm's, but I adore them! Even better, my husband hasn't stopped talking about them since I put them in the living room. He says they're colorful and fun, yet soft. Men are all about functionality - I'm glad he keeps me in line so our house isn't just pretty, it's comfortable, too.
And to top it off, the cheerful colors remind me of a happy honeymoon and keep the dreary weather away a little :)
I'm considering offering these in my Etsy shop! Let me know in the comments if they're something you'd consider buying one day. Do you get inspired by items in stores and make your own, but even better?
Savannah Bay, Virgin Gorda, BVI ![]() |
I just had to bring some of that joy back home with us!
I've been aiming us towards a loosely-defined beach inspired living room. Our initial inspiration for the room were some palm tree coasters
Over-the-top beach is too much, but beachy colors are OK, right?
I saw these pillows in the West Elm catalog the day after we got home - they were so whimsical and fun! The colors weren't really doing it for me though. Time to DIY my own knockoff scrappy pillows!
![]() |
![]() |
Lucky for me, I have a quilter Mom who has been making hundreds of sunset quilt kits (buy one here!).
![]() |
that snorkeler is me! ![]() |
The 12" blocks she sells leave scraps that are far too useful-looking to throw away. I called her up and "ordered" an shipment of assorted scraps. Thanks Mom!
I pressed and starched all the pieces to make them behave nice, then I cut 1/2" strips on the bias, at least 5" long. I planned ahead to let the edges fray a little in the wash - cutting the fabric on the bias keeps the fraying from getting out of control.
I did this for all the fabrics she sent me, and ended up with a pretty fabulous collection!
Next I cut four 5" strips of muslin. The goal is an 18" pillow, so 18"/4 = 4.5", but then you have to add 1/4" on each side for the seam allowance, which gets you up to 5". I cut the muslin strips longer than necessary, since I was sewing the colorful strips on at an angle.
I laid down a variety of strips with controlled randomness. At first it didn't look right, so I called Mom! I was using too much red. Narrowing the colors to blue, green, and yellow helped a lot.
Something else wasn't quite right. Mom came to the rescue again to remind me that I had forgotten to leave white space. Duh!
I tried just sewing the strips on, with no pins or guides, but that was a disaster. They were crooked and messy, and it wasn't working. I also tried using the same color thread for them all, and that look bad too.
Instead, I measured where each strip should start, then pinned the strips down.
I used five different colors of thread, matching as close to the various colors as possible - yellow, turquoise, sage, navy, and cerulean. Much better!
Once the panels were done, I trimmed off the excess, lined up the stripes, and sewed the panels together.
Then I squared up my pillow front and cut it down to 18.5" square. At this time, I also cut an 18.5" muslin square for the pillow back.
I sewed the front and back together, and installed an invisible zipper along one side. This was a complete pain, and I wouldn't do it again! Save yourself the trouble and just make a pocket for the pillow form!!!
I ran them through a vigorous wash cycle with a Shout Color Catcher
I inserted the pillow form (a higher-quality one I got on sale at JoAnn), and was done! Oh yeah, except then I made two more...
This project took sooo loooong, but most of that time was spent cutting strips from 35 fabrics (I have lots of leftovers), getting the colors right, and installing those stupid zippers. Live and learn. Along the way, I also had a little accident with my rotary cutter. Those buggers are sharp, so keep your fingers out of the way! My pillows probably cost about $15 each, but took a bazillion hours.
In the end, it was all worth it.
![]() |
I'm not sure my pillows are much cheaper than West Elm's, but I adore them! Even better, my husband hasn't stopped talking about them since I put them in the living room. He says they're colorful and fun, yet soft. Men are all about functionality - I'm glad he keeps me in line so our house isn't just pretty, it's comfortable, too.
And to top it off, the cheerful colors remind me of a happy honeymoon and keep the dreary weather away a little :)
I'm considering offering these in my Etsy shop! Let me know in the comments if they're something you'd consider buying one day. Do you get inspired by items in stores and make your own, but even better?
Labels:
decorating,
living room,
pillows,
recycling,
sewing,
tutorial
Subscribe to:
Posts (Atom)