Wednesday, October 3, 2012

Wedding Dress Wednesday: The Big Reveal


Wedding Dress Wednesdays are guest posts written by my Mom, Janet

When our daughter Bonnie was born, my friend gave me some tiny dresses, almost doll size!  Bonnie was a pretty big baby (8lbs.12oz), so when she was a few weeks old, I started putting them on her and taking pictures!

My husband laughed, “you dress her up like a doll!”  Sure, it’s fun!  And look how cute she is!

Then I started sewing for her.  I learned to smock, and I made tons of cute outfits for her.  By the time she was in grade school, she preferred store bought clothes, but we still made party dresses, costumes and swim suits.  Then, in high school she re-discovered my talents.  She realized that store bought gowns were not well made, had crappy fabrics and didn’t fit her figure.  I was ‘in’ again!  :)

I always told her, “when you get married, I’ll make any dress you can dream up!”

I used to sew for the public and made lots of wedding gowns over the years.  But doing Bonnie’s gown has been the most special thing – ever!  I’m so happy we decided not to buy a dress, and I really enjoyed the process and working as a team.  For months we discussed whatever daily issues came up.  Of course, the dress was just one thing out of a hundred that had to be taken care of for the wedding! 

Well, if you have been following this blog – you have read about designing the dress, picking fabrics, making and testing the pattern, tweaking the details, beading, all the disasters and joys of making my daughter’s wedding gown! 

It was fun to show our family how it was all coming along.  The Groom’s mother swore he would cry when he saw the bride!  I don’t think he did – he was so excited he couldn’t sleep!  But I do know he was wowed!  You can see in all the photos – both of them are just glowing!! 

Enjoy the photos and I hope you have enjoyed our journey.  Congratulations Bonnie and Tommy!

Love, MOM


Here are a few photos of the journey:

we shopped for inspiration
found a pattern to start from (a vintage 80's pattern no less!)

shopped the garment district for the perfect fabric and lace
tweaked the pattern
did lots of fittings, some long-distance
added accessories and beading to finish the look

and took care of some last-minute issues


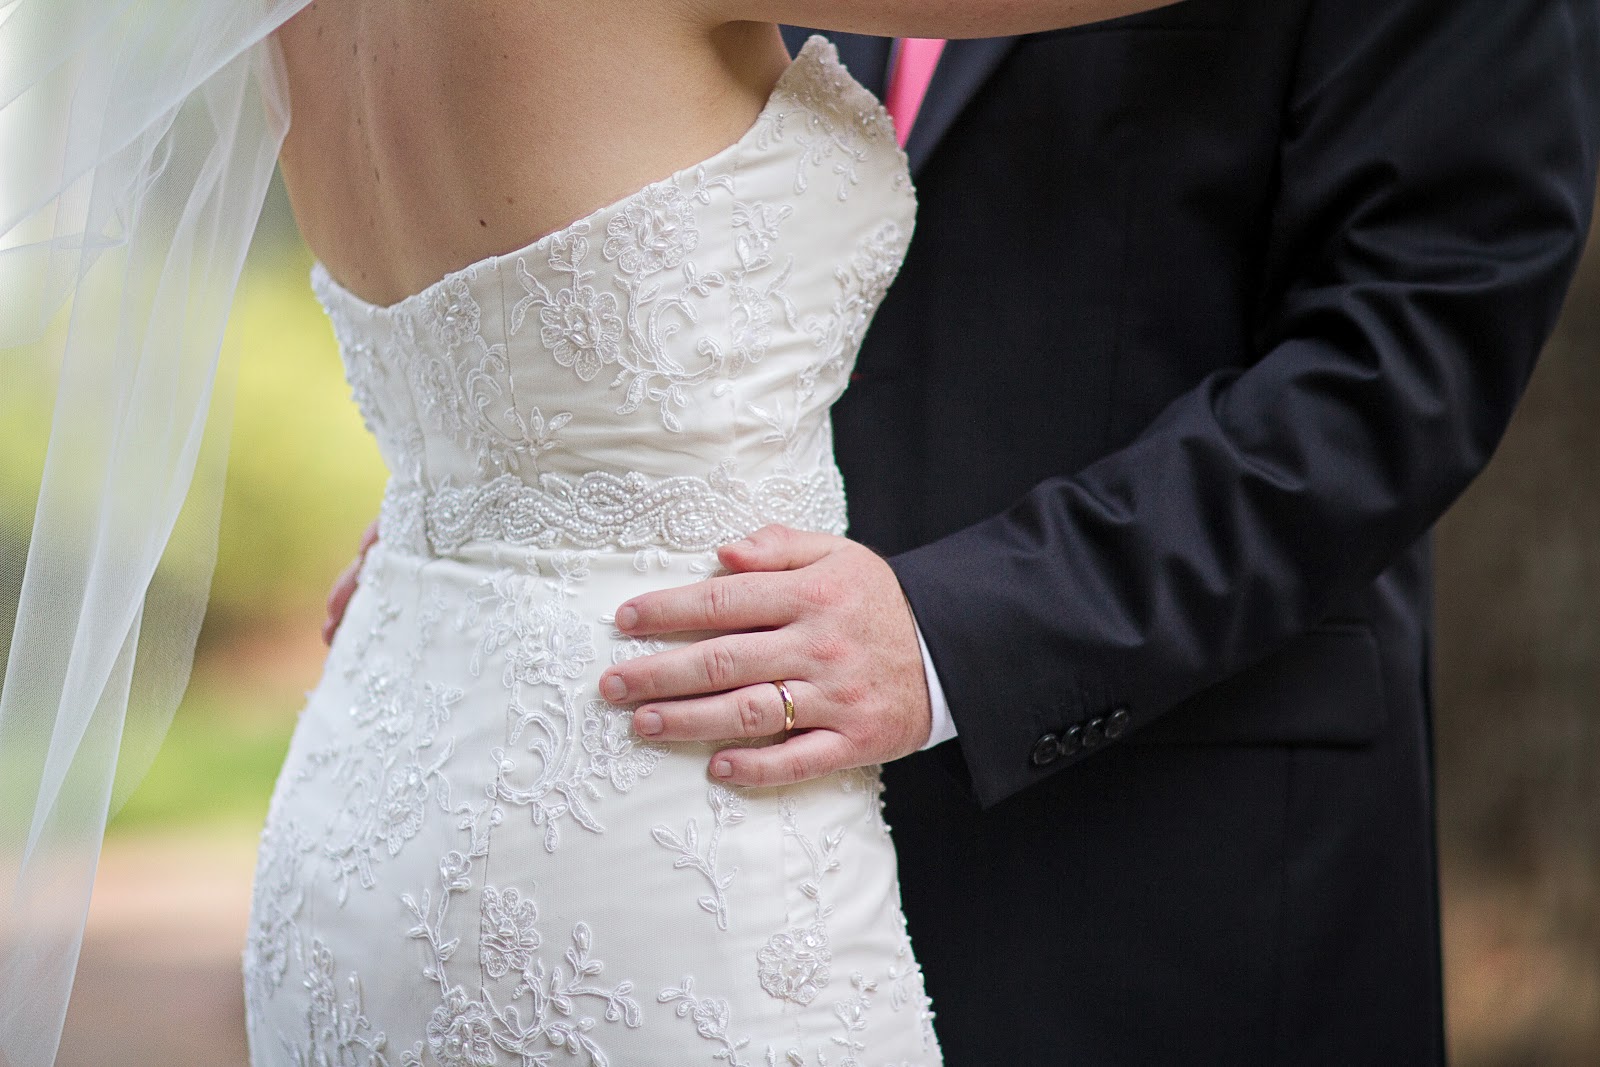
And finally it was ready for the wedding!!!  A sweetheart strapless fit and flare beaded lace wedding dress with ruffled train!  (These beautiful images are by Whitney Huynh Photography)


Fall Container Gardening

This post brought to you by Miracle-Gro. All opinions are 100% mine.

We received this beautiful sculpture-like planter as a wedding gift.  While I can imagine exactly what I want to plant it in come Spring, I've been uninspired so far this fall.

Quadrant Plant Stand by Crate and Barrel

But when we started cleaning out the basement,  I found some lettuce seeds Mom had sent me last year.  The new planter would be perfect for a small fall lettuce crop!  It's on the deck so I can easily harvest the lettuce, and up off the ground so we know it won't be tainted by dog pee.  I checked out this video by Gardenieres on setting up a container garden, just to make sure I know what I'm doing (and it seems like it do - it's pretty straightforward!).

(1) Miracle-Gro

One of my biggst challenges with container gardening is remembering to water the darn things.  I used to kill plants all the time by forgetting to water them, but that all changed once I started using Miracle Gro's Moisture Control potting mix.  It retains water without keeping the plants soggy, and slowly releases it as the plants need it.  I can now get away with watering the plants about every two weeks, but if I water more often, they're still OK.


I started using it about 10 years ago, and those very first plants are still alive!  Which really says something to me, because it's not like I've learned to water more frequently.


The times they are a changing, because now there's even a Miracle-Gro Facebook page, but I have to say they do have some great tips on there!  I'm sure I'll be back for help from their community if my lettuce-lets get a disease.

I'm excited for the rainy evenings and cool nights to start helping my little seeds along!  I can't wait to enjoy a home-grown salad!

Advertisement
Visit Sponsor's Site

Monday, October 1, 2012

Dyeing for a change

My beautiful wedding dress has been getting a lot of press on this blog lately, but I really adored my "reception" dress, too!  Did you know I bought it before we were engaged?  Yep, I liked it that much!  It also had pockets and was on sale - no way was I passing that up!


It's comfy, flattering, fun, and very "Bonnie".  It was perfect to change into at the wedding so I could dance more freely.

But what the heck can I do with an ivory cocktail dress outside of my own wedding?  10-year high school reunion?  Date?  Certainly not a bridal shower or someone else's wedding!

I really like the dress, but the color just isn't working for me.


I've been doing some research online, and a company called Dharma Trading Company specializes in dyes for all sorts of uses, including silk and polyester!  While it sounds like a somewhat difficult (and risky!!!) project, it's inexpensive and it seems like plenty of people are doing it.

Some risks include shrinkage (you have to get the water super hot), thread and zippers not taking the color, it turning out a weird color, or ruining the garment altogether. 

I will probably find one or two occasions to wear this dress in ivory.  In another color, though, it could be great for all sorts of fancy events!  Is it worth it???

Let's assume it is.  Here are some options for colors, with dresses so you can get an idea of how it might look when it's all said and done.  All the colors are either Fiber Reactive or Acid Dye from Dharma's web site.  The dresses are from all over, but links are in the captions.

Red, pinks, and corals are some of my favorite colors.  They're really fun and energetic.  That said, pink and red dresses aren't always appropriate for weddings, which is where I'd probably wear this dress most often.

{1,2,3,4}

Greens are very pretty, but don't always suit my skin tone.  If the dye turned out to be dulled down, I could see where it might look ugly.  Greens are quite flexible as to where you can wear them though.  And always great for a Christmas party!!!

{1,2,3}

Blues are super classic.  They'd probably look OK if they didn't turn out very bright.  I look good in all blues.  They're good for weddings, dates, anything really.  But they might be a little boring for such an interesting dress.

{1,2,3}

Purple, grey, beige, and brown - these all seem like off-the-beaten path options, but appealing ones!  I'm not sure how I look in them, and I could see them going out of style.  They're quite flexible though, and can always be paired with pretty accessories!

{1,2,3,4}


So what do you think?  Should I dye the dress?  If so, what color???


Wednesday, September 26, 2012

Wedding Dress Wednesday: Be Prepared

I know I promised a big reveal today.  I'm sorry!  I didn't get our photos yet!!!  Next week?

Also, my Mom's been traveling, so she fell a little behind in her writing.  So you're getting Bonnie this week!

I'd like to talk a little about being prepared for the worst.  I hate when unexpected things crop up, so I like to prepare ahead of time to minimize the impact.  This seemed especially important where a wedding was involved!

For our guests, I took care of them with my save-a-guest kits, packed full of medical supplies, a sewing kit, safety pins, and about a dozen other useful things.  I know it saved at least one guest from a pounding headache, so it was totally worth it in my book.  (Hey guests - if you know of someone else using them, tell me in the comments!)

Nobody knew this,  but we also had an extra dress and button-down on hand in case someone had a wardrobe malfunction.  It was my Mom's runner-up Mother of the Bride dress and Tommy's runner-up shirt.  Good backups for them, yes, but also good alternatives for similar-sized guests.

For myself, I had a whole variety of backups!  My #1 goal of the day was to get married.  My #2 goal was to not get a migraine.  I had over the counter and prescription meds on hand all day.  I also had some fabulous bridesmaids who made sure I ate, drank plenty of water, and stayed in a relaxed environment. No migraine!

For any post-ceremony wardrobe disasters, I had an ivory BCBG cocktail dress (reception dress).  I figured if something happened to my dress, I'd still look like a bride but be perfectly comfortable in the smaller dress.  I ended up changing into it when I got too hot in my wedding gown.

it looks a lot shorter on the model!
For pre-ceremony wardrobe disasters, I had my Mom, a sewing kit (with extra fabric), and a tide pen.  I also left an extra hour in our schedule for the day to accommodate any issues.  Boy did those ALL come in handy!!!

While my Mom and I were driving down to South Carolina for the wedding, we had a conversation that went kind of like this:

Bonnie: "It seems weird that so many expensive wedding gowns seem to have issues.  Just in the past year, I've been at two weddings where something happened to the bride's gown, and one where a bridesmaid had an issue."

Mom: "Well, just because the dress is fancy doesn't mean the thread and zippers are, too.  Most wedding gowns have the same zippers you'd find in garments from Target."

Bonnie: "How long do you reckon it takes to sew someone into a wedding dress?"

Mom: "Um, about fifteen minutes I'd say."


Fast forward a week, and it was 1:00 pm on our wedding day.  Makeup and hair were perfect, I had the shoes on, as well as the torturous undergarments.  It was time to don the dress!  I slipped it on, my Mom zipped it up, ... and the zipper separated.  My bridesmaids gaped in horror.  We tried to unzip it, but it was stuck at the top.  Everyone kind of held their breath, expecting Mom and me to lose it.  Instead, those years of costuming (and costume emergencies) kicked in, Mom pulled out the needle and thread, and she spent the next 45 minutes sewing me into the dress.  Crisis averted!


I did my first look with Tommy, and we rushed off to get some pre-ceremony photos at the Battery!  It's a beautiful park, but it's 100% mulched.  Those amazing shots we got left us with some souvenirs - namely, mud on my dress.  But never fear!  Mom grabbed a wet paper towel and it rubbed away flawlessly! Thank goodness for polyester!


We absolutely, 100%, recommend the following:
  • Schedule more time than you think you need.  Even with my extra hour, we didn't have time for pre-ceremony family photos as planned.
  • Make sure someone with a sewing kit (and who can sew) is on call.  Have thread that matches the bride, groom, bridesmaids, groomsmen, and parents.  Every single wedding I've attended (and I'm in my late 20's so that's a lot), I've known at least one person who had a clothing issue, many of those being the bride.  I actually bring sewing kits with me to all weddings now, and tell the bride ahead of time, "call me if anyone has a wardrobe malfunction!!!"
  • Be sure you know how to get stains out of your wedding dress fabric.  All fabrics are different, so ask at the store what to do.  
  • Have some form of backup, maybe with a spare dress (for ladies) or button down (for men). 

There's just no sense in letting your clothing mess up your wedding day.  Plan ahead, and it'll all work out just fine.


Follow Me on Pinterest

Monday, September 24, 2012

Sweater Pillow with Buttons

It's officially fall, y'all!

I'm really excited about changing our home decor with the seasons - nothing super drastic, just some little touches here and there to give the essence.  A quick, easy, and cheap way to do this is by changing out your throw pillows.

I've been loving the idea of sweater pillows - the coziness of the textures in sweaters just oozes fall warmth for me.

There are plenty of options on the market - just check my pinterest page!  But I thought it would be cool to upcycle old sweaters for pillows instead!

Every time I drop off donations at Goodwill, I also peruse the store to see what treasures might be lurking in there.  On a recent trip, I spotted two sweaters that had great colors and textures for my pillow project.  At $5 each, they were perfectly on-budget.  I brought them home and washed them on hot and with oxiclean to get them nice and sanitized.


I found pillow forms half-off at Hancock's over the weekend, and those were my materials!

I started with the sweater with the buttons - it seemed more fun.  I haven't gotten to the second one yet.

After studying the shape of the sweater, I realized I'd need to cut off kind of a lot of the fabric - the neck, the sleeves, and the pockets.  This would leave me with sort of a small pillow, but since they were for our accent chairs, that was OK.

I started by pinning the right sides together in my shape.  Sweater knit is super forgiving, so I didn't worry about measuring it for size or anything, I pretty much winged it.


I had to remove the top two buttons - one would go to waste, and the other would get caught in the seam.  After I sewed the seam, I sewed the button back in place.  I moved the extra one to a lower spot, creating a nice line of buttons all the way down the pillow.

I sewed the buttoned seam together to take the pressure off the buttons.  This kept the buttoned part from gaping open.

I sewed three sides of the pillow, and also about two inches on either side of the fourth side.  Then I crammed my pillow form in there, and hand-stitched the fourth side closed.  I mushed the pillow around to get the form aligned well.

Upcycled sweater pillow

And that was that!  About an hour of work and $11 per pillow, and I was done!


Follow Me on Pinterest

Wednesday, September 19, 2012

Wedding Dress Wednesday: Hand beading

Wedding Dress Wednesdays are guest posts written by my Mom, Janet

Last week, I covered how I engineered a button-off removable train.  This week I'll tell about hand-beading the bodice.

The inspiration dresses featured a variety of bodices: One was plain silk, which showed everything (seam lines, underwear, jiggly bits, etc.).  Some were heavily embroidered.  One even had 3-D lace flowers scattered around (which we really liked).  Bonnie liked an open lace design (where the flowers are spaced apart) and I thought it looked lighter, airier, and more summery. 

I shopped around, and found lace I liked in the garment district of LA.  The one I picked is a lightweight lace called Chantilly lace, which is re-embroidered and lightly beaded.  I picked one that had a pretty border in case we needed it (we didn’t) and that looked pretty on top of the dress fabric.  It was only $35 a yard and I got 2 yards to play with.

Lace for Bonnie's wedding dress
Lace for Bonnie's wedding dress - you can see the beading more clearly in this photo
Close-up of the original beading on the lace

I started by examining the floral design very carefully.  You want to be sure that the flowers are going the right way!  No dead flowers!  This lace pattern was actually across the fabric, I guess to facilitate using the border on a hem. 

To get the flowers spaced out well on the pattern, I laid the bodice parts under the lace and wiggled them around until the flowers were scattered in good places on each bodice piece.  I strive for ‘controlled randomness’ – not too crazy but not too lined up.  You should also avoid placing a flower right on the end of the bust. 

I loosely pinned the lace to the dress fabric and chopped around each bodice section.  Save all those extra pieces because you can use stray flowers to fill in gaps at the end.  Also be sure and keep any beads that fall off!

Next comes layering each section of the bodice.  I layered the lace over the dress fabric, then put a cotton underlining beneath them.  The underlining prevented being able to see through the lace and dress fabric. 

I pinned all the edges extremely well, stretching the lace netting so that it laid very flat.  I thought the wrinkles in the lace would iron out, but it was actually a function of how the lace was made, so by stretching it slightly, it lay a lot smoother once everything was all sewn together.  Once the pieces were pinned, I sewed a stay-stitching line about ½” from the edges. The stay-stitch gets hidden in the seam allowances once everything is sewn together.

The most important hint I have is to trim away beading anywhere near a seam!  Sewing over beads is a nightmare – your seams end up wonky and you end up breaking beads and needles.  You’ll want to remove all beading within about 1 ½ - 2” from all edges.  Be sure to examine how the beads are sewn on.  In our case, each flower cluster was attached with one continuous piece of thread.  If you trim off just one bead or sequin, the whole flower cluster needs to be redone.

 
After the dress bodice is sewn together and you are happy with the fit, you can use those spare beads and sequins to fill in where you had removed them earlier.  I used matching thread and a narrow needle.  Some seed beads require a beading needle, but most of the fake pearls and sequins work fine with a regular sewing needle. 

I like to bead sitting at a table with the item laid out in front of me.  This enables you to slide your hand underneath and control everything.  I use a dark colored towel under my beads – they can’t roll around and you can pick them up easier.

Beading the belt, but I use the same set-up regardless of the project

When beading a gown, I first repair all the flowers where I had to remove beads.  In a few instances, an important flower ended up on a seam.  I wanted ones’ eye to travel smoothly over the lace design and not stop at a seam, so I cut out flowers from the scraps and appliquéd them over seams.  I also used this trick in areas that seemed too sparse.

I appliqued lace flowers on top of seams and in sparse areas
Then I started “beefing-up” the beading.  I added a few on the ends of tendrils where there was only thread.  I followed some main stems of flowers and made some of the importantly placed flowers more heavily beaded. 

I added pearls and sequins to the flowers

One thing I learned years ago was to scatter your beading lightly. Then go back and do more, and repeat until you are satisfied or run out of patience or time!  If you start out heavily beading a section, you are locked into doing the entire dress that way!  

I like to bead more on the neckline and bust area; it leads the eye up to the bride’s face.  The top of the dress also gets seen and photographed more than any other part.  I left the waistline alone since the belt would be there, and having the belt on top of heavy beading would be too bulky.


If your pearls are too white for the fabric, you can dye fake pearls in a weak mixture of Rit Dye.  String them on a thread and dip them in a measuring cup filled with hot water and 1/4t of dye.  Start with a weak solution - you can always add more but you can’t take it away!  Most fake pearls are very white, so this helps if your fabric is ivory or ecru.  Fortunately Bonnie’s lace had plenty of beads we could reuse, so I got to skip this step. 

I kept adding beads whenever I had some quiet time, right up until two days before the wedding!  Then I tacked down the lining and added a personalized tag. 

Next week is the final Wedding Dress Wednesday post!  We'll cover some lessons learned, give some tips and tricks, and do the big reveal!!!


Sunday, September 16, 2012

Dinner Crisis!

By the way, I'm still not sponsored by anyone, I just want to share! 

I don't normally talk a lot about our personal life when it's not involving projects, but I absolutely have to share this one!  I guess it's kind of like a project...

Somehow getting married made us lose the ability to plan and make dinner.  I don't know why or how, it just happened.  Maybe it was the longer commute, the huge list of home projects, or simply the pretty view from the back deck.  Or maybe it's just another symptom of the decision fatigue I've been experiencing since about three months before the wedding.

In any case, we got to the point where we would either eat out, eat pizza, or eat cereal for dinner.  This wasn't good for our health or our wallets!

A friend of mine blogged about losing baby weight, and said she'd been using something called emeals.  I googled them, and sure enough, it's a real thing.

eMeals - Easy Meals for Busy People!

It's like this: I pay about $5 a month.  In return, I get a week of dinner menus, all planned out.  Each one takes less than an hour to prepare (more like 20-45 minutes).  They handle the nutrition and calorie balancing, I just follow the directions.  They also give me a complete shopping list that should cost less than $100. 

So is this actually working for us?  YES!

I now put zero thought into what we're going to make for dinner, what I'm going to shop for, and how much it's all going to cost.  That means more time and money for enjoying married life, and more time and money for projects!!!  And honestly, our back deck beats any restaurant in the area.  I'm also not throwing away all kinds of food at the end of the week because I couldn't figure out how to use it.

One week I spent $80 on groceries.  The following week I used the extra meat I froze, and we were only in town three days, so my groceries were $10.62.  Last week they were about $60.  Compare that to even one night eating out, and we're so far ahead it's crazy!

We're doing the "Clean Eating for Two" program.  All the recipes make exactly two portions, and consist of fresh fruits and veggies, whole grains, and lean meats.  We're eating some staples, like rice, tomatoes, beef, and chicken, mixed with some items we had eaten only occasionally before like shrimp, jalapenos, and limes.  We're also trying some foods we've never had before, like orzo, kale, and lemongrass, and you know what?  They're yummy!

They also offer programs for singles and families, for people with kids, for vegetarians or other dietary restrictors, and even programs that follow weekly store sales so you save even more money.  I signed up for three months, just to try it, and also found a nice coupon through retailmenot.  {by the way, if you're not searching Retail Me Not for coupons every time you buy online, you're losing out on lots of great deals!}

Here are a few of our recent meals:
Chicken Parmesan with Tomato Argula Salad
Lemongrass and lime shrimp stir-fry
Balsamic Chicken and Greek Orzo

So anyways, that's my new exciting thing I'm up to.  Just wanted to share in case it rescues someone else from the dinner blues!


SAVE TIME AND MONEY WITH EMEALS MEAL PLANS


Follow Me on Pinterest