Friday, June 28, 2013

Rainbow Sherbet Cocktails

My neighborhood had an ice cream social last week, so I wanted to share what I brought!


My Aunt Mary bought some rainbow sherbet vodka recently, but wasn't a fan, so she passed it on to me.  Serendipity struck, as this happened mere days before the ice cream social.  So of course I had to make a drink!

The vodka is super-sweet.  We tried mixing it with 7-Up, and it tasted like cotton candy.  Wayyy to sweet!  To cut down on all that sugar, I decided to mix it with sour/bitter fruit juices.

Rainbow Sherbet Cocktail:
  • 1 oz. Pinnacle Rainbow Sherbet Vodka
  • 2 oz. Orange Juice
  • 2 oz. Cranberry Juice
  • Lime for garnish

These were fruity and refreshing - perfect for a hot summer evening!


Tuesday, June 25, 2013

Extra Long (and cheap!) Curtain Rod

Weren't those 
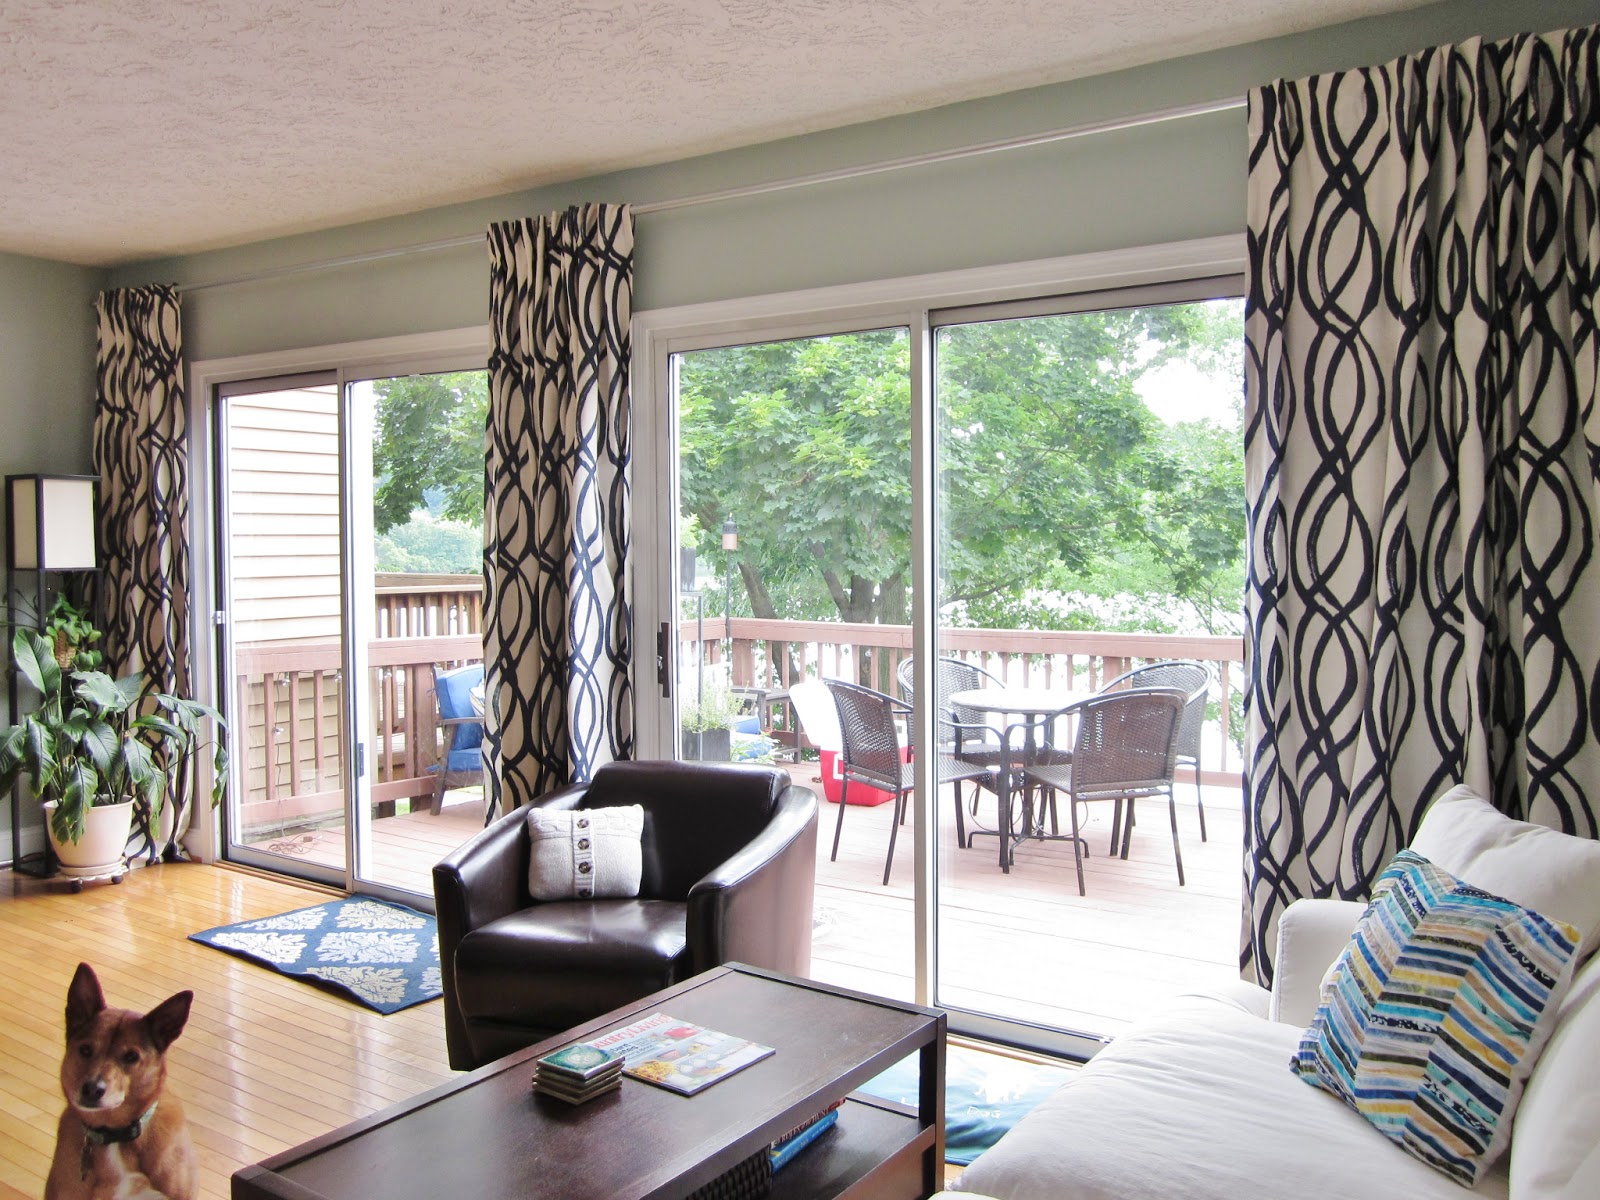
curtains last week exactly what was needed to finish off the living room?


Did you stop to wonder how in the heck we managed to get a 20' curtain rod?

Ordering the curtains was easy.  The problems started when we tried to hang them.  That wall with the sliding doors is 20 feet wide, so not just any curtains rods would do.

First we tried two 10' rods.  The problem with regular curtain rods is that they require a center support.  If you use the center support, the curtains have to be on both sides of it, meaning that in our living room, we'd have a lot of curtain mass bunched between the doors in the center, which I didn't want at the time, even though we're doing it now.

We tried hanging them without the center support, but the rods were wimpy and sagged under the weight of the curtains panels.  FAIL.  So we returned them.  Did I mention they're like $150 for two?

Next we researched curtain tracks.  These are not only ugly, but they're also expensive ($300) and get poor reviews.  We thought it was our only option, so we ordered them.  In the end, it turns out I didn't ever click "order" (don't drink and shop online?), so they never came!  I was really excited about this instance of serendipity, because in the meantime I thought up an even better idea!

Back when my Mom had a women's clothing store, she used electrical conduit poles to hang stock in the warehouse.  I'm talking hundreds to thousands of pounds of clothing hung on each pole.  Turns out a 10' conduit pole is not only strong, but is also only $7!!!

The strength of the pole allowed me to have a 10' span of rod, uninterrupted by a support.  I bought two 10' conduit poles, 1" in diameter.

Now I just had to figure out how to attach it to the wall!

I bought every single thing sold at Home Depot that might possibly work (L brackets, shelf brackes, curtain rod brackets, wood pieces used for stairs, etc.), and brought it all home.  In the end, what worked best and looked best was a shelf bracket.

We attached it to the wall with super-duper triple-action drywall anchors.  We attached the conduit with conduit straps.  The center bracket acts as the support for both poles.

they didn't need to be exactly 10' each, so Tommy cut off a little with a hacksaw


Shopping List (they're not paying me, I just wanted to show you what we bought):


Let's play "where's Waldo?" with the bracket...
there it is!
pretty simple, just a shelf bracket, conduit strap, and conduit piping
We left conduit past the ends so we could use the curtains to cover the brackets

I'll admit that these are not the most-beautiful-ever-in-life curtain rods.  However, they cost less than $25, span 10 feet without a center brace, and with the pattern on the curtains, you don't really notice them anyways.

I'll take it!

If you're not crazy about the look of conduit, I used some hammered spray paint recently that would give these a beautiful finish.  I didn't bother for this project, but maybe in the future I'll decide to spruce them up.  Something to think about.  In other homes, I bet gold or wrought iron black would look amazing.

So for a few hours of labor (mostly trial and error to see what would work) and $25, we were finally able to hang up those curtains!  Sure beats the $150 ones that sagged or the $300 ones that were ugly and probably wouldn't even work all that well.

On future projects, even if I don't need a 10' span, I'll definitely be going with conduit.  The economics are just too good!

This project was really easy, and one I would definitely recommend!  Be sure to have a friend on hand - this was sooo much easier with two people.


Monday, June 24, 2013

Liquid Hand Soap

The DIY liquid hand soap I made a few years ago has been one of my most-visited posts.  I recently made it again, but changed up the recipe a little, so I'll share what I did differently!


What I loved about the first one was:
  • It made over a gallon of hand soap
  • It was free from hazardous crap like triclosan (in antibacterial soap; read more about it from the FDA, wikipedia, beyond pesticides, EPA, but essentially it can bioaccumulate, it's a hormone disruptor, and it isn't proven to be better than regular soap)
  • It was cheap
What I didn't love:
  • It kind of felt like snot
  • It didn't get sudsy enough for our tastes
  • My husband hated it

So I fixed all that!  This recipe still makes cheap, healthy handsoap, but doesn't feel like snot and gets plenty sudsy.  My husband had no idea it was homemade.

I picked up this yummy little soap at Homegoods for $3.  I simply went through them all and picked the one with the best scent that didn't have nasty chemicals in it.


Ingredients:
  • 1.5 c grated soap
  • 2 T vegetable glycerin
  • 8 c water
  • It's the ratio that's important here.  If you grate your soap and get 3 cups, just double everything!

Method:
  • Grate the bar soap using one of the finest grating on your cheese grater
  • Add all ingredients to a large kitchen pot (it's OK to use a good one - it's just soap!)
  • Heat and stir until the soap is dissolved (I like to use a whisk)
  • Let cool completely to room temperature, so you know for sure you're not ending up with a brick of soap sponge (like the first time I ever tried this)
  • Fill up your containers!


The only bummer about using more soap in the recipe is that now it doesn't make as much.  Still, 2/3 of a gallon of hand soap for $3 is pretty darn good!  It also made less than the first time because the bar of soap was a good bit smaller.

Some hints:
  • If it turns into a spongey mess once it cools, just heat it back up and add more water
  • If it's too liquidy, first make sure it actually cooled all the way, then add more soap, reheat, etc.
  • I got my Glycerin at Whole Foods, but my readers say it's also available in pharmacies.  I paid about $6, but haven't even used half of it yet.
  • Avoid using soap with "stuff" in it, like tea leaves or exfoliating beads - they clog up your soap dispensers.


Wednesday, June 19, 2013

Living Room Update: Curtains

These lovely curtains were the very first thing we changed when we bought our house.  Mauve, beige, plaid, and dog-pee-stained, no thank you!!!  We moved in and they moved out.


And then it took me six months to pick out new ones.  I considered making my own, but when I saw these Scribble Window Panels in midnight blue in the West Elm catalog, I couldn't turn them down!  At $35 a panel (after discounts), they were relatively affordable, so I ordered them!


Hanging them was quite the challenge (more on that soon).  Apparently a 20' span isn't a run-of-the-mill kind of curtain project.


They really make the room feel finished.  These curtains soften the room and simply make our home feel "us".  {sigh.}


I love how the waves mimic the motion in the lake out back.  I also love that they can block the view into our living room from the neighbor's deck!


They're a fun pattern, without being feminine.  They also tie in nicely with our beachy-without-actually-being-beachy living room theme.


They're a little overwhelming when totally closed, but we don't have them like that very often - only on super sunny afternoons so far.  


I haven't bothered to hem them yet, but I actually kind of like how they "break" on the floor.  I'm debating whether to sew the panels together.  If I don't we can choose to push them all the way to the sides or keep some in the middle.  But not sewn, they're more of a pain when you want to close them because you have to arrange each one just so.  I have bigger fish to fry right now, so they'll stay unsewn for a while longer.


Curtains really provide a lot of bang for the buck.  For a total project cost of $230, they gave a completely different feel to the room.  And a lot of privacy!  They also make a huge difference with solar radiation - if we close these when the sun is pouring in, it keeps the room a lot cooler.  So I'm smitten!


BTW, scroll back up to the first photo - I'm pretty excited over how far our home has come in the past year!


Tuesday, June 18, 2013

Living Room Update: Sofa

I'm not just here to brag on our new sofa - I also want to share that the right sofa can make an awkward room feel normal again.


We have a weird-shaped living room.  It's 20' x 12 ', has an entire wall of sliding glass doors (with a spectacular view), and can be seen from everywhere on the main floor.  The TV can only be hung on the short walls.  See how awkward it was before?


Those specs left me with sort of a design challenge.  Split the room?  It's kind of small.  Add more chairs?  Looks cramped.  Sit a long way from the TV?  Then he'll want a bigger one.

We weren't really planning on replacing our sofa - our premarital one was good enough.  Or so we thought, until we both got the flu (the one that's like a cold that makes you want to die) for a week and spent most of it on the couch.  After a week on the couch, we concluded it was too small and too uncomfortable, and it had to go, like now.  Luckily, it also coincided with the time of year sofas go on sale!

Once we were over the flu for about a week, we hit the furniture stores.  We ended up finding the sofa of our dreams, on sale, at Arhaus. 

We hemmed and hawed with all sorts of options, and finally went with a large-size sectional L-shaped sofa.  We splurged in the comfort department and opted for down-filled cushions.  On the practical side of things, it has a fitted slipcover, so I can take it off and launder it if anything bad happens.  We can also order a different slipcover in the future if we decide white isn't working for us anymore.  Arhaus has carried this style for over 30 years, with plans to keep it in their stock forever, so we can order more pieces in the future if we happen to move.

Oh, and it seats about a dozen people if need be (hello in-laws!) - or at least both of us and the dog all sprawled out! 


And we love it!  It feels like it was made for this room, and it makes the room so much more functional.  We can see the lake, the kitchen, and even the TV (though it is 20' away...).

I topped it off with my Caribbean scrap pillows.  We kept the coffee table (love the storage) and tiny rug.  If you look close, you'll also see Lucky's toy basket hiding in the corner.


You might also notice a new picture ledge and snazzy curtains - more on those soon!


While it's by far the priciest piece of furniture we've ever bought, it's also our favorite!  Well worth the money, if you ask me :)


Are there any pricy pieces of furniture you've been glad you bought?  Share below!


Monday, June 17, 2013

Ironing Board Cover

Remember how when I dyed my wedding dress, some of the dye rubbed off?  With all that blessed ironing I had to do on it, both my iron and my ironing board ended up blue!

I was sick of my cheapo iron anyways, so I relegated it to be more of craft iron than garment iron.  I threw the ironing board cover in the wash.  The dye actually came completely out.  But my cover shrunk so much that I couldn't get it on the board anymore!

Which means I got to do a project!


I know you haven't seen it yet, but in my craft room all the accessories are "Bonnie Pink", so of course I needed a Bonnie Pink ironing board cover!

I dug around and found a large piece of quilting fabric that was perfect!  If you're buying it new, you need about 1.75 yards of cotton.  I also found some leftover batting and cording I had bought for my failed attempt at making roman shades (you'll need 4 yards of cord).

I washed the fabric before doing anything else - I didn't need another one shrinking up on me!  Because I didn't have an ironing board cover, I couldn't iron the fabric first, but this project doesn't require perfection so it wasn't a big deal.  Remember that - perfection is not required!!!!

I laid out the fabric and tried to get it relatively smooth.


Then I laid the batting over the fabric and smoothed everything out.  Our foster kitten told me that it was wide enough to double up, so I did that, too!  (She showed up during a storm a week ago, and is going to her forever home soon!)


I laid the ironing board on top of everything and outlined it with a Sharpie so I'd know how big to make everything.  I pinned all the layers together to keep stuff from shifting.


Then I sewed the layers together, making it so my stitching would end up on the side of the ironing board (it's hard to iron stuff flat if there are lumpy stitches underneath).  Then I trimmed off the excess batting.


I cut the extra fabric off about 2.5" from the edge of the ironing board.  Looking back, I wish I had done 3.5" or maybe even 4".


I sewed the excess into a pocket for the cord to go in.


I forgot to leave a slit so I just cut one instead.  Then I threaded my cord through the pocket using a safety pin attached to the end as a guide.


And that was it!  I put it on the board and tightened the cord! (yay that rhymes)


But... it wasn't a tight as I had hoped.  The ends were fine, but the middle was just eh.


To fix that, I used some scrap fabric and made two sets of ties.  I sewed them to the edges of the cover.  Once the cover was back on the board, I tied the new ties - much better!  Now everything is staying in place.


All in all, this project took about 1.5 hours, and cost $0 since I had all the materials!  The new ironing board looks spiffy with my craft room!  Now I can also get around to all those projects where ironing stuff is a crucial step :)


Friday, June 14, 2013

Lemon Drop Martinis

Happy Friday!

I'm sorry I've been so absent lately!  We were making a big push to finish lots of projects in preparation for the housewarming party we threw last weekend, and I didn't leave myself enough time to blog about them as they were happening.  But the plus side is that now I have lots of great projects to share with you!

Since we have a sunny and hot weekend ahead of us, I thought it would be a great time to share the recipe I used for the lemon drop martinis I served at our party.  I'll share both the party-size and single-serve recipes.

These are easy and delicious, but they can sneak up on you, so be careful!  They're also pretty low-calorie, if you're watching your figure :)


Party-Sized Lemon Drop Martinis
(enough to quench the thirsts of 50 people)
  • 3 gallon drink dispenser
  • Smirnoff Citrus Vodka (1.75 L bottle)
  • DeKuyper Triple Sec (1 L bottle)
  • 2 gallons water
  • 4 packages sugar-free lemonade mix
  • Mix and serve over ice!


Single-Serve Lemon Drop Martinis
  • 4 oz. lemonade
  • 1.5 oz. citrus vodka
  • .5 oz. triple sec
  • Mix and serve over ice!


We had some left over after the party, so I filled up a used wine bottle with the extra.  We've been enjoying it all week, and it seems to keep pretty well!

Have a lovely weekend!